

Layering accessories workflow: your style guide
TL;DR:
- A deliberate accessory layering process combines jewelry and fashion accents to create polished, expressive outfits. It relies on principles like length variation, metal dominance, and limited statement pieces to build visual depth and cohesion. Using practical tools, proper storage, and experimentation enhances the workflow and personal style expression.
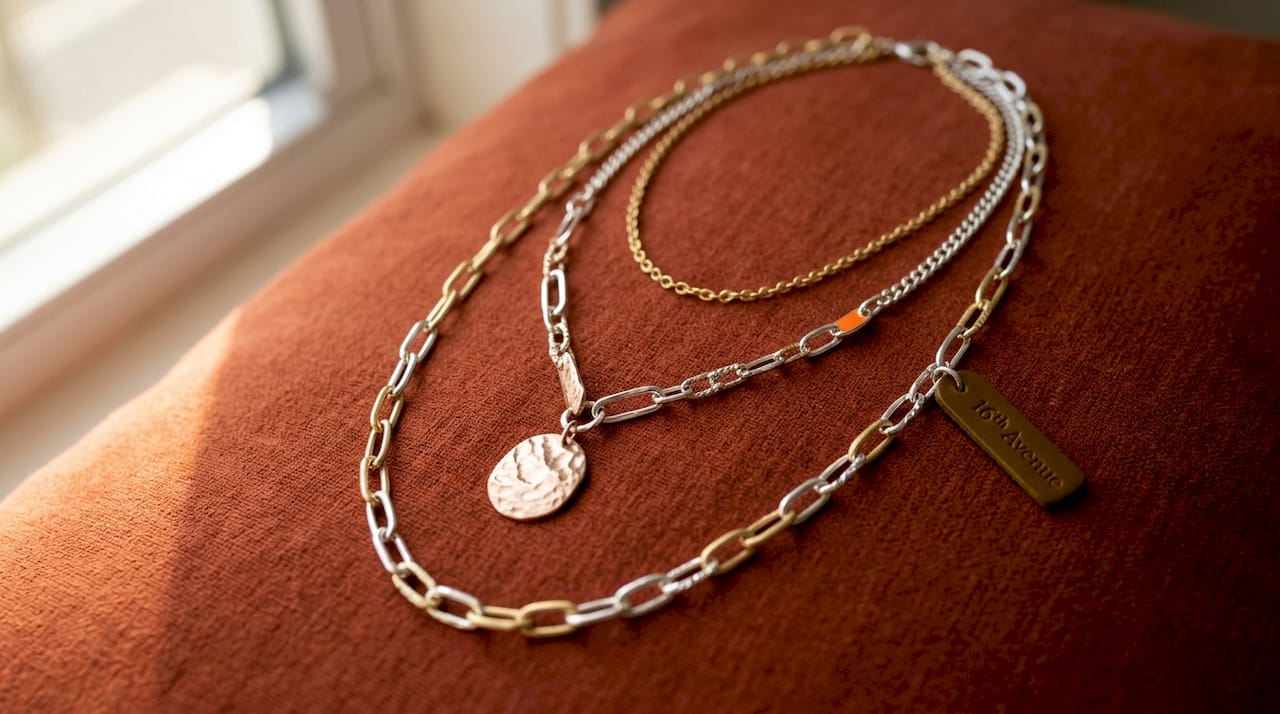
A layering accessories workflow is the intentional process of combining jewellery and fashion accents in coordinated sequences to create outfits that feel polished, dynamic, and distinctly yours. Mastering this process means more than piling on pieces. It means understanding how length, texture, and metal tone work together to build visual depth. Expert techniques from houses like Chanel have long demonstrated that accessory layering follows clear principles, and once you know them, every outfit becomes an opportunity to express something intentional.
What are the foundational principles of layering accessories?
The most reliable framework for necklace layering is the rule of three. Fink’s Jewelers recommends building from a close-to-collarbone foundation piece, a mid-length pendant as your focal point, and a longer flowing chain to complete the trio. This structure creates depth and prevents the crowded, tangled look that trips up most people when they first experiment with stacking. Each piece occupies its own visual zone, so the eye travels naturally from one layer to the next.
Length variation is the single most important variable in any workflow for layering. When two necklaces sit at the same length, they compete for the same space, tangle constantly, and flatten the overall look. Spacing pieces at least 5 to 7 centimetres apart gives each one room to move and be seen.
Texture mixing works alongside length to add dimension. A fine cable chain paired with a beaded strand and a hammered pendant reads as considered rather than accidental. The contrast between smooth and textured surfaces creates the kind of visual interest that makes people ask where you got your jewellery.
Metal mixing follows its own logic. The approach that works consistently is:
- Choose one dominant metal as your anchor (yellow gold, silver, or rose gold).
- Introduce a second metal as an accent in smaller or thinner pieces.
- Use a bridge piece, such as a two-tone pendant or a mixed-metal charm, to connect the tones visually.
Beyond necklaces, the same principles apply across all accessory categories:
- Necklaces: vary length and texture across three distinct zones.
- Bracelets: mix cuffs, chains, and beaded pieces on the same wrist.
- Rings: stack thin bands with one statement cocktail ring per hand.
- Earrings: treat them as a single statement layer rather than a background detail.
Pro Tip: Start every layering session by laying all your pieces flat on a white surface before putting anything on. Seeing them together outside the jewellery box reveals clashes and combinations you would never spot in a mirror.
How to combine statement and delicate pieces effectively
Statement pieces and delicate pieces serve opposite functions in a layered look, and understanding that distinction is what separates a styled outfit from a cluttered one. Vogue’s Chanel-inspired layering approach demonstrates this clearly: choose one or two statement moments, then let everything else recede. A chunky gold chain or a pair of bold sculptural earrings commands attention. The pieces around them should support that command, not compete with it.
The practical rule is simple. Pick your focal accessory first, then build outward with pieces that are quieter in scale and finish. If your statement is a wide hammered cuff on one wrist, the necklaces you choose should be fine and linear. If your statement is a layered pendant necklace, keep your ears and wrists minimal.
Maximalist layering, as seen in Chanel runway styling, does not actually break this rule. It multiplies the statement moments, but it streamlines the outfit underneath. A tailored blazer or a clean-lined dress gives bold accessories the neutral backdrop they need to read as intentional rather than overwhelming.
Key principles for balancing statement and delicate pieces:
- Limit yourself to two statement accessories per outfit.
- Keep metals consistent between your statement pieces even if you mix elsewhere.
- Scale down accessories in zones adjacent to your focal point.
- Pair maximalist jewellery with structured, minimal clothing.
Pro Tip: When you are unsure whether a combination is too much, remove one piece and check the mirror. If the look improves, that piece was competing. If it feels incomplete, put it back.
What tools and techniques support a smooth layering workflow?
The physical mechanics of layering matter as much as the aesthetic choices. Layering clasps, extenders, and multi-strand connectors are the practical tools that make the difference between a look that stays put and one that tangles within an hour. A layering clasp attaches multiple necklaces to a single fastener at the back of the neck, keeping them spaced and aligned throughout the day. Extenders add length to a chain so you can position it precisely within your layered arrangement.
Follow this sequence when building a layered necklace look:
- Put on your longest piece first and fasten it completely.
- Add the mid-length piece next, checking that it sits above the longer chain.
- Attach the shortest, collarbone-level piece last.
- Use a layering clasp to connect all three at the back if tangling is a concern.
- Adjust the front arrangement before leaving the mirror.
Storage is where most people lose their layered sets. Proper storage practices prevent damage, maintain the finish of your pieces, and reduce the time you spend untangling before you even get dressed. Dedicated jewellery organisers with individual hooks or compartments keep chains separated and ready to wear.
Practical storage and care habits that protect your collection:
- Hang necklaces individually on hooks rather than coiling them in a box.
- Store pieces by length so your layering sets are pre-grouped.
- Clean delicate chains with a soft cloth after each wear to prevent tarnish buildup.
- Keep silver and gold pieces in separate pouches to avoid micro-scratching.
For anyone building a curated jewellery wardrobe, investing in quality pieces with sturdy clasps pays off immediately in the layering workflow. Cheap clasps fail under the tension of multi-strand arrangements, and a broken clasp mid-outfit is a problem no extender can fix.
How do texture, metal mixing, and layering styles shape your look?
Metal mixing is one of the most misunderstood aspects of accessory layering. The common fear is that gold and silver together look unintentional. In practice, mixing polished, matte, and hammered textures across different metal tones creates cohesion because the eye focuses on the textural contrast rather than the tonal difference. Filigree Jewelers notes that texture differences help the eye move across a layered arrangement and connect pieces that would otherwise feel disconnected.
The dominant metal principle gives you a clear starting point. Choose the metal that appears in your largest or most central piece, then treat all other metals as accents. A dominant yellow gold statement necklace can carry silver rings and a rose gold bracelet if the secondary pieces are smaller in scale.
| Approach | Best for | Example combination |
|---|---|---|
| Single metal, varied texture | Minimalist layering | Three gold chains: polished, matte, and twisted |
| Two metals, one dominant | Everyday mixed looks | Gold necklaces with silver stacking rings |
| Vintage and modern mixed | Expressive, personal style | Antique brass pendant with contemporary fine chains |
| Full mixed metal | Maximalist layering | Gold, silver, and rose gold across all accessory zones |
Vintage and modern pieces together create a layered personality that purely contemporary collections rarely achieve. A Victorian locket on a modern fine chain, or a 1970s enamel bangle alongside a sleek geometric cuff, signals that your style is considered rather than catalogue-assembled. This is where personal style expression through accessories becomes genuinely distinctive.
Texture choices to consider when building a layered set:
- Polished finishes reflect light and read as formal or refined.
- Matte finishes absorb light and feel more casual and grounded.
- Hammered surfaces add organic movement and work well as bridge pieces between tones.
What are common mistakes in accessory layering and how to fix them?
The most frequent mistake in any layering styles guide is treating length as optional. Pieces at identical lengths tangle, visually merge, and eliminate the depth that makes layering worth doing. Styling experts consistently emphasise that variation and intentional contrast are the non-negotiable foundations of a successful layered look.
Common layering mistakes and their corrections:
- Identical lengths: Space pieces at least 5 centimetres apart to create distinct visual zones.
- Two competing statements: Designate one focal accessory per outfit zone (neck, wrist, or ears).
- Mismatched styles: Pair vintage pieces with other vintage or transitional pieces, not with ultra-modern minimalist chains.
- Ignoring the neckline: V-necks suit longer pendant layers; crew necks work best with shorter, closer-set pieces.
- Overcrowding one zone: If your neck is heavily layered, keep wrists and ears minimal, and vice versa.
Metal clashes are almost always a texture problem rather than a tone problem. When two metals look wrong together, it is usually because both are polished and the same scale. Introducing a hammered or matte piece between them resolves the visual tension without removing either metal from the look.
Pro Tip: Photograph your outfit before you leave the house. The camera flattens depth in a way that reveals whether your layers are reading as distinct or merging into visual noise. If they merge, add one more centimetre of length difference between your necklaces.
Key takeaways
A successful layering accessories workflow depends on three non-negotiable principles: length variation across distinct zones, a single dominant metal as an anchor, and no more than two statement pieces per outfit.
| Point | Details |
|---|---|
| Use the rule of three | Build necklace layers across collarbone, mid-length, and long zones for depth and flow. |
| Anchor with a dominant metal | Choose one metal as your focal tone and treat all others as accents to maintain cohesion. |
| Limit statement pieces | Restrict bold accessories to two per outfit and keep surrounding pieces quiet in scale. |
| Use layering tools | Clasps, extenders, and multi-strand connectors keep pieces aligned and tangle-free all day. |
| Store pieces by length | Pre-grouping your layering sets by length saves time and protects your collection from damage. |
Why I stopped following rules and started using them as a starting point
The honest truth about the layering accessories workflow is that the rules exist to give you a foundation, not a ceiling. I spent years following the rule of three so precisely that every look I put together felt technically correct and completely forgettable. The shift happened when I started treating the rules as a diagnostic tool rather than a prescription.
When a layered look feels off, I now run through the checklist: length variation, dominant metal, statement count. If all three are in order and the look still feels flat, the problem is almost always that I have played it too safe. A single unexpected piece, a chunky vintage chain dropped into a fine gold arrangement, or a matte black cuff alongside polished silver, changes everything.
What I have found genuinely useful is building seasonal layering sets in advance. For autumn and winter, heavier textures and warmer metals feel right. For spring and summer, fine chains and mixed pastels carry the season. Knowing your sets before you get dressed removes the decision fatigue that leads to under-layering or over-layering in a rush.
The readers who get the most out of accessory styling guides are the ones who use them as permission to experiment, not as rules to follow perfectly. Confidence in layering comes from repetition, not from getting it right the first time. Wear the combination that feels slightly too much. You will learn more from that than from playing it safe every day.
— Glenville
Build your layered look with 16th Avenue

16th Avenue carries the pieces that make a layering accessories workflow genuinely enjoyable to build. From necklaces in varying lengths to mixed-metal bracelets and statement earrings, the collections are curated with coordination in mind. The autumn and winter woolen coat is a seasonal essential that gives layered jewellery the clean, structured backdrop it needs to shine. Pair it with stacked necklaces and a bold cuff for a look that reads as completely considered. Browse the full accessories and beauty collections at 16th Avenue to find the pieces that complete your layered style this season.
FAQ
What is the rule of three in necklace layering?
The rule of three places one necklace at the collarbone, one at mid-length, and one as a longer flowing chain. Fink’s Jewelers recommends this structure to create depth and prevent a crowded or tangled appearance.
How do you mix metals without clashing?
Choose one dominant metal and use accent metals in smaller or thinner pieces. Filigree Jewelers explains that adding a hammered or matte bridge piece between two tones resolves visual tension and creates cohesion.
How many statement accessories should you wear at once?
Limit statement accessories to two per outfit. Vogue’s Chanel-inspired approach shows that bold pieces need a streamlined outfit and quieter surrounding accessories to read as intentional rather than overwhelming.
What tools prevent necklaces from tangling when layered?
Layering clasps, chain extenders, and multi-strand connectors keep necklaces spaced and aligned throughout the day. Storing chains on individual hooks rather than coiled in a box also significantly reduces tangling between wears.
How do you layer accessories for winter outfits?
Heavier textures and warmer metal tones suit winter layering well. Structured coats and knitwear provide the neutral backdrop that lets stacked necklaces, cuffs, and bold earrings read clearly without competing with the outfit’s weight and texture.